When planning a make-over for a camper or RV, it is important to consider how you will be using the space in addition to how you want it to look. If I were choosing something to look at, I would consider something like these that I have pinned to my Pinterest board:

Absolutely adorable, right?

Or this one. So cute.
But I can’t see Saint moving all the darling accessories out of his way to prop up his feet after a hard day of fishing. So, I had to think about what we could both live with. We needed:
- A place for everything and everything in it’s place.
- Something that will travel well without having to be put away and gotten out at each campground.
- Light and open (as much as a small trailer can be.)
- Easy to clean.
- Comfortable with a homey, resort feel.
- DIY improvements that were affordable.
- Something that would retain its value.
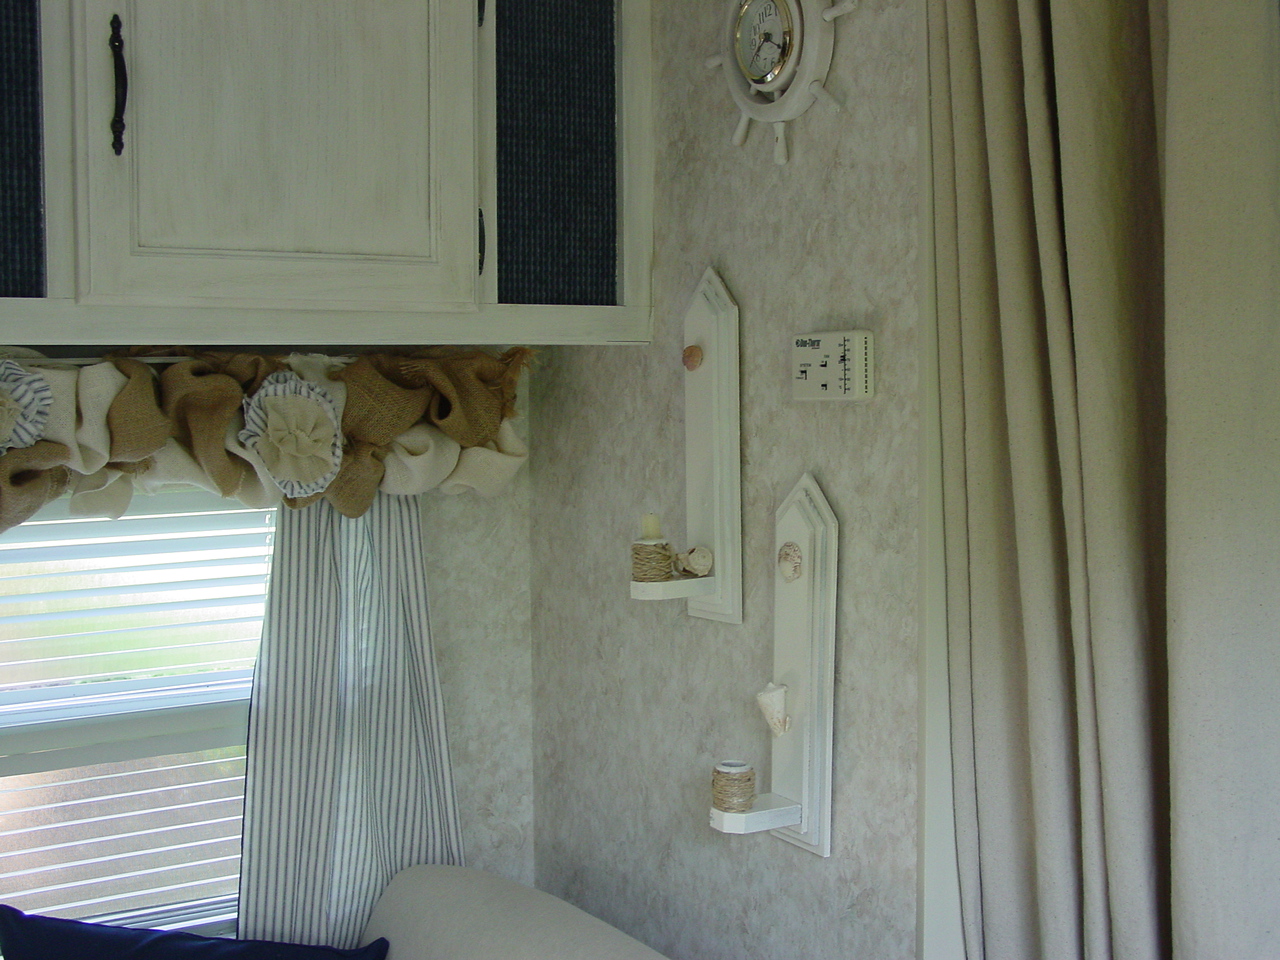
We decided on a coastal cottage look. The most bang for the buck came from painting the oak cabinets. We had paint leftover from repainting our kitchen cabinets. We used TSP to clean them, removed the doors and drawers, and used a good oil based paint. We did two coats without a primer and the coverage was fine. The white glossy color was too bright for the tones of the counter top, floors and walls. I wanted a driftwood tone, so I bought a small can of Sandalwood stain (gray tones) and wiped it on and off, leaving an antique look in the crevices. It achieved that driftwood look I wanted and by using paint I already had, the project cost less than $10.00.
We took the old gold hardware off and sprayed it with RustOLeum oil rubbed bronze paint. Well worth the $7.00!
The next thing we did was remove the old 80’s valances from all the windows. For all except the bedroom, I used fabric that I already had. Natural and traditional burlap, blue striped “ticking” fabric, and some white sheers I already had were altered. I used lots of inspiration from things on Pinterest, especially the fabric flowers that I cut and stitched and hot glued.
I decided on a nautical navy and white stripe fabric for recovering the booth cushions. We did not remove the old upholstery. It was easy to simply wrap the fabric around like a package and duct tape it to the back. If and when we want to change it, it will be simple to do. We also used burlap to cover the padding around the seats, above the door, and under the sofa.
So, here is a before and after picture of what we have done thus far:

Dining Booth Before

Dining Booth After
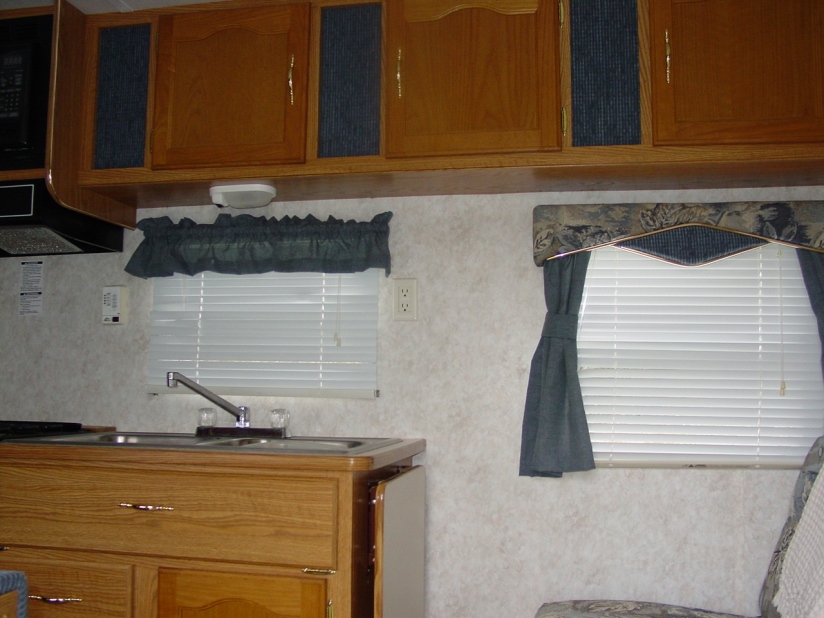
Kitchen Before

Kitchen After
I made the pillows out of the burlap and striped fabric I had left, and I did a faux screen print of a starfish and seahorse that I linked to on an earlier post here. I used a twin fitted knit sheet from WalMart to “slip cover” the sofa; totally removable and washable. Added cost, $17.00 for the set, and I used the flat sheet on the top bunk in the back.
So, what do you think, so far? I’m loving it…and right on budget.
Total thus far: $34.00